


Table of Contents
◉ Introduction ◉ Definitions & Context ◉ Gear Myth Busted ◉ Step-by-Step Guidance ◉ Pros, Cons & Risk ◉ Mini Case Study ◉ Common Mistakes & Tips ◉ FAQs ◉ Conclusion
Introduction
Video is now the default language of the web—and your transitions are the punctuation that keeps viewers from scrolling away. In 2025, 89% of businesses report using video in their marketing, and explainer formats remain the single most popular content type at 73% of video marketers. Short-form clips deliver top ROI across social platforms, making fluid, visually engaging transitions a must for attention retention and brand polish.
Audiences increasingly watch on mobile, where fast, tight edits matter: 79% of U.S. consumers prefer to watch video on a smartphone, and Instagram users now spend nearly two-thirds of their in-app time watching video, with Reels competing directly against TikTok and YouTube Shorts.
Worried your gear isn’t “cinema” enough? Don’t be. The tutorial featured in this guide was shot largely on a mid-decade Sony A6000 and stresses creativity over cameras; that advice tracks with industry data showing smartphones have eaten the mass camera market—global camera shipments collapsed roughly 94% between 2010 and 2023 as phones took over everyday imaging.
🏃♂️ Don’t have Premiere Pro yet?
Get the full version FREE for 7 days and follow this tutorial step-by-step.
Download Free Trial
Get the full version FREE for 7 days and follow this tutorial step-by-step.
Download Free Trial
Definitions & Context: What Makes a Transition “Seamless”?
A seamless cinematic transition hides (or stylizes) the cut so motion, light, shape, or subject continuity drives the viewer forward without jarring interruption. The video we’re adapting demonstrates seven core methods you can execute natively in Premiere Pro—no external plug-ins required.
Below are working definitions tied to Premiere Pro terminology so you can translate tutorial moves into repeatable workflows:
• Speed Ramping (Time Remapping): Gradually accelerates or decelerates playback across keyframed ranges, smoothing the change in clip speed so action lines up across an edit. Implemented via Show Clip Keyframes ▸ Time Remapping ▸ Speed and Bezier handles to “ramp” instead of jump.
• Masking Transition: Uses an animated opacity mask (often driven by an object passing through frame) to hide the outgoing shot and reveal the incoming shot beneath it. Masks can be inverted, feathered, and keyframed in the Effect Controls panel.
• Frame Blocking Fade: Rather than cutting behind a fully tracked mask, you compositively overlap two shots so a dominant horizontal or vertical line (ceiling edge, railing, wall) visually bridges the cut while opacity cross-fades through the overlap.
• Whip Transition (In-Camera Motion Cut): You pan or tilt rapidly at the end of Clip A and begin Clip B with the same directional motion; the motion blur smears detail, letting you hard-cut at peak blur for a natural whip pan handoff.
• Speed & Direction Cut: Cut on action when objects move in the same screen direction and similar speed across adjacent clips (e.g., skateboarder right-ward into pickup truck right-ward). The eye tracks motion, forgiving the cut.
• Match Cut: Align framing, subject position, or gesture across two otherwise different environments so the viewer perceives continuity (person walking, profile angle, stride). Temporarily reduce opacity of the top layer to align during edit.
• Color & Shape Flash: Use bright lights, flares, or solid color fills that briefly dominate the frame in both clips; cut (or dissolve) during the flash for a stylized wipe. Color grading tools (Lumetri, LUTs) let you unify the flash hue across shots.
Gear Myth Busted: Creativity Beats Camera Body
In the tutorial, the creator openly states most demo shots came from a five-year-old Sony A6000 and that you could replicate transitions on an iPhone. The point: planning motion, screen direction, and foreground reveals matters more than sensor bragging rights.
Industry trend lines agree. Data aggregated by PetaPixel from Statista and CIPA shows a 94% drop in global camera shipments since 2010, largely because smartphones became “good enough” for the majority of use cases—especially social video.
When viewers are watching mostly on phones, ultra-shallow depth-of-field from cinema glass is less critical than clean motion, readable subjects, and engaging pacing. Remember: nearly two-thirds of Instagram usage time is already video, and short, mobile-optimized clips dominate social engagement.

Create Seamless Transitions with the Latest Premiere Pro
Unlock Optical Flow, AI Audio Cleanup, and one-click proxy workflows—fresh in the 25.x releases.
Get It NowStep-by-Step Guidance
Below you’ll find each transition broken down with timestamps so you can scrub the source tutorial, follow along in Premiere Pro, and adapt to other NLEs (Final Cut, DaVinci Resolve) as needed.
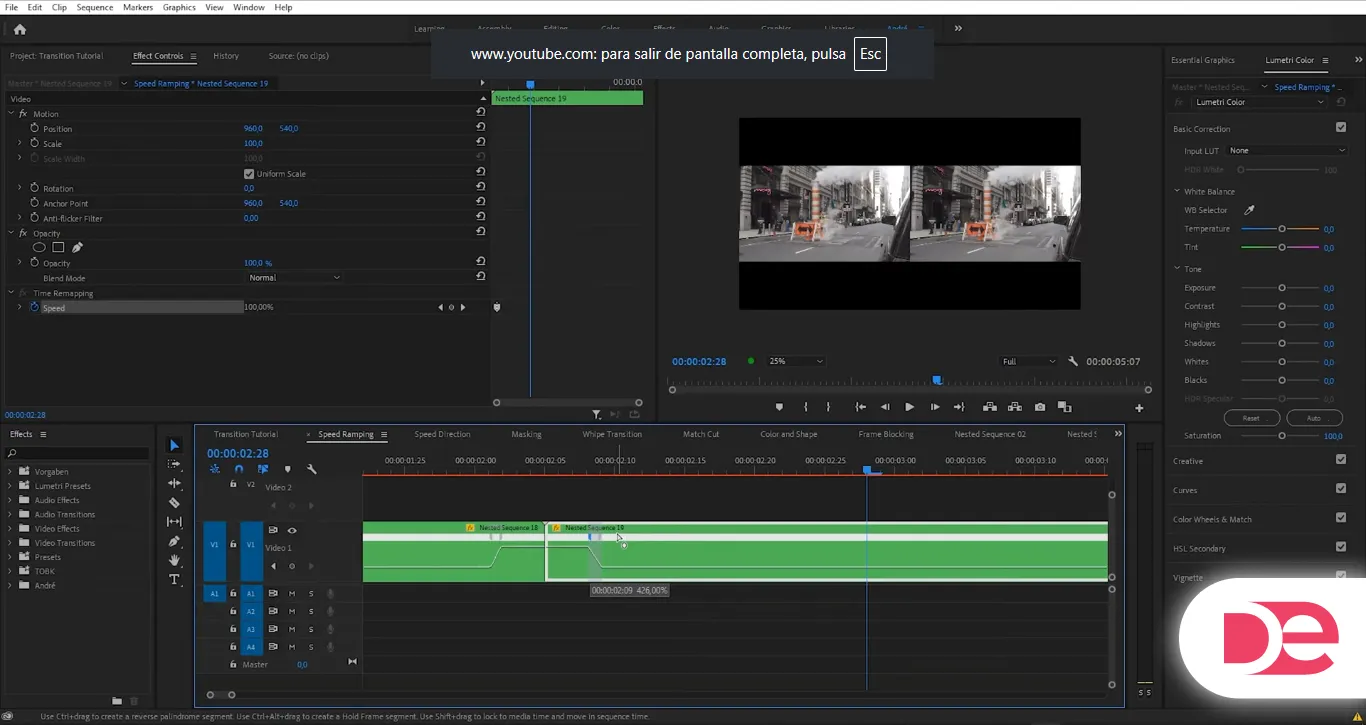
Speed Ramping Transition
Use Time Remapping to surge out of Clip A and slam into Clip B at matching velocity—classic action glue.
Prep
• Nest each clip you’ll ramp so speed edits don’t ripple upstream. (YouTube)
• Zoom the timeline for frame accuracy; enable Show Clip Keyframes ▸ Time Remapping ▸ Speed.
Ramp Out of Clip A
• Add a keyframe a few frames before your intended cut; add a second at the end.
• Drag the post-cut portion of the speed rubber band upward (e.g., ~750 %)—adjust per footage.
• Pull apart the keyframe halves to create a ramp; adjust Bezier handle for smooth acceleration.
Ramp Into Clip B
• Repeat: set early keyframe, second keyframe a bit in, raise incoming segment to high speed, then ease down to normal after the overlap.
• Fine-tune by trimming the cut where both clips hit peak blur.
Playback & Adjust
• Render In/Out if Optical Flow or extreme ramps stutter.
Masking Pillar Reveal
Animate an opacity mask tied to a foreground object (train pillar) so Clip B appears as the object wipes across frame.
Draw & Animate the Mask
• Nest the clip to be masked; park playhead just after the chosen foreground edge enters frame.
• In Effect Controls ▸ Opacity, click the Pen (Free Draw Bezier) to outline the reveal region.
• Invert the mask if you drew the “keep” vs “remove” area backward.
• Feather ~5–10 px to soften seam; expand as needed.
Keyframe the Path
• Enable Mask Path, Mask Feather, and Expansion animation toggles.
• Step forward frame-by-frame, reposition mask points to follow the pillar edge until it fully crosses frame.
Critical Cleanup
• Advance one extra frame past the first keyframe and drag mask fully offscreen to avoid a stuck black bar artifact—a common beginner mistake flagged in the tutorial.
Composite
• Place the reveal target (Clip B) on the track below; align its in-point with your first animated mask frame.

Frame Blocking Opacity Fade
When two shots share a strong line (ceiling edge → railing), you can overlap and fade opacity instead of animating a complex mask.
Assemble
• Stack Clip B under Clip A so the visual “line” you want to match appears in roughly the same screen band.
• Trim Clip A to end where the line is fully visible; trim Clip B start so its line aligns at that frame.
Opacity Ramp
• In Clip A’s Effect Controls ▸ Opacity, set keyframes: 100 % at alignment frame; 0 % a few frames later (or earlier for faster punch).
• Adjust fade span until the line reads as one continuous surface in playback.
Refinement
• Slight Y-position nudges (scale to 105 % first for re-framing headroom) help lock edges.

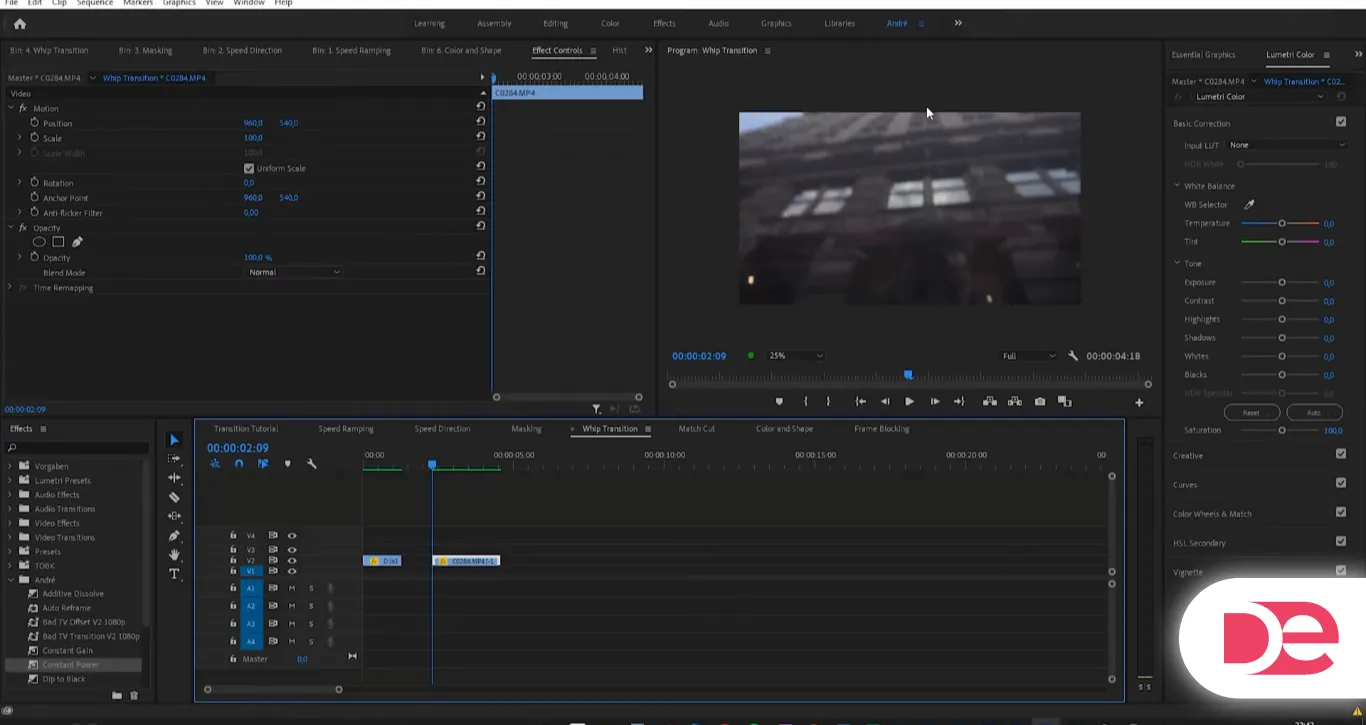
Whip (Motion Blur) Transition
This one happens mostly in camera: end Clip A with a rapid pan/tilt, start Clip B with the same direction and speed. Cut at the blur peak.
Shoot Guidelines
• Commit to a direction (e.g., top-down whip) across both clips.
• Accelerate hard at the tail of Clip A; begin Clip B mid-whip so you’re already moving.
Edit
• Scrub to the frames where motion blur is thickest; set your out-point (A) and in-point (B) there.
• Butt-cut (no dissolve).
• Optional: add directional blur if the motion wasn’t fast enough. Use consistent angle to reinforce direction.
Speed & Direction Cut on Action
Match directional movement (skateboarder moving right → pickup truck moving right) and cut while a large moving object fills frame for a natural flow.
Select Cut Points
• Trim Clip A so a transitional object (police officer crossing frame in tutorial example) fills the screen; the eye follows that motion.
• Trim Clip B so its moving subject (truck) is similarly scaled and moving in same screen direction.
Assemble
• Place back-to-back; adjust by single-frame nudge (Alt/Option + arrow) to sync velocities visually.
• Add a 2–3 frame audio crossfade if ambient sound changes sharply.
Match Cut
Sync two near-identical human actions (friend walking riverside in two locations) so the viewer experiences a geographic jump without disorientation.
Scale for Safety
• Temporarily scale both clips to ~105 % so you can reposition to align body placement; this is straight from the tutorial and a great pro habit.
Overlay Alignment
• Stack Clip B under Clip A.
• Drop Clip A opacity to ~20 % so both are visible; nudge Clip B position until limb and stride line up.
• Return opacity to 100 %; trim excess handles; test playback.
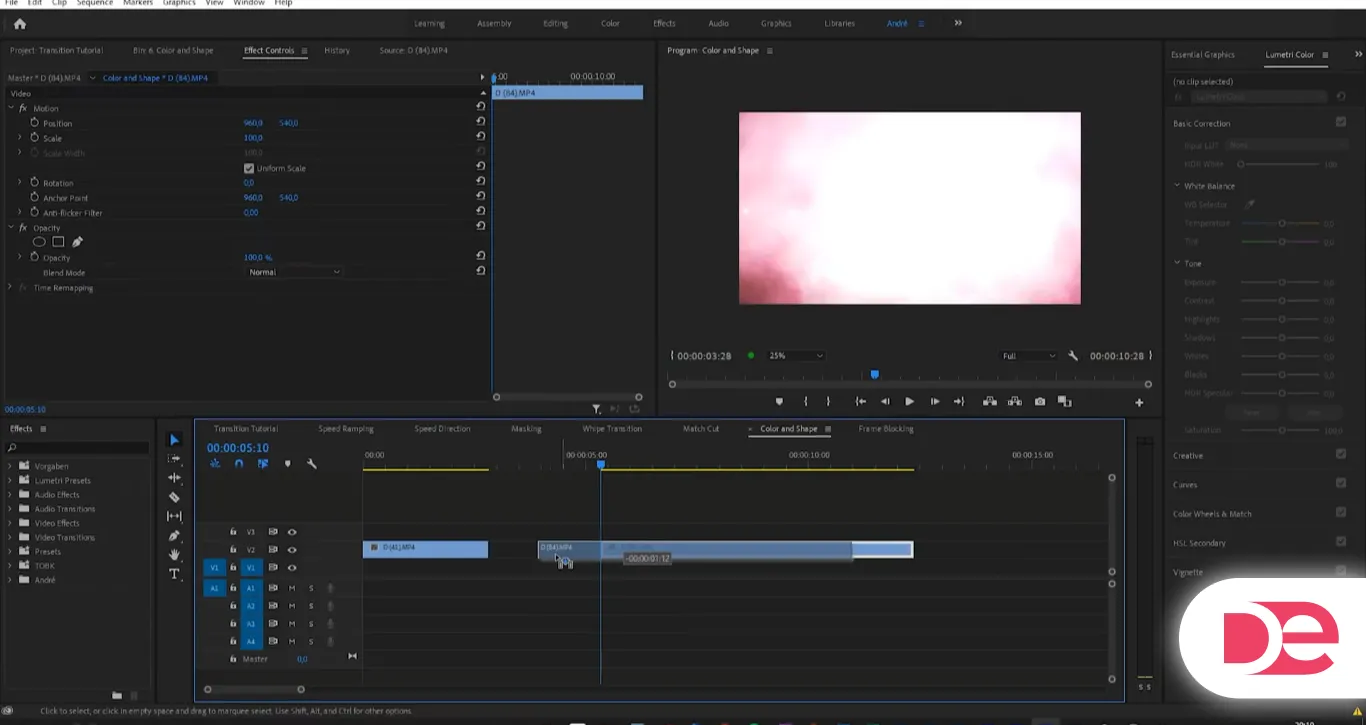
Color & Shape Flash Cut
Cut during shared flashes of bright color—elevator lights → light flare—to create a stylized, high-energy wipe.
Mark Flash Frames
• Scrub Clip A to the brightest flash; set out-point there.
• Scrub Clip B to a frame where light or lens flare fills most of the Program Monitor; set in-point.
• Cut on the peak white or peak color.
Unify Color
• Apply Lumetri Color or a LUT to push both flashes toward the same hue temperature; tiny adjustments make the cut feel intentional. Premiere Pro’s Lumetri workspace was designed for rapid grading directly in the edit.
Pros, Cons & Risk Management
Why Use Seamless Transitions
• Maintain audience retention across short-form, mobile-first storytelling where drop-off spikes after just a few seconds. Short motion-driven transitions help keep viewers watching through clip changes.
• Increase brand recall and professionalism in marketing videos—formats marketers continue to invest in heavily for 2025.
• Leverage widely adopted software: Premiere Pro’s installed base is estimated at ~30 million users and leads the pro editing market, so team handoffs and presets scale.
Limitations
• Overuse creates “transition fatigue”; audiences call out gimmicks in pro forums and social groups—use intentionally, not every cut.
• Complex masks and ramps are time-intensive on longform, multi-cam edits; reserve for story beats.
• Motion blur mismatches between mixed-frame-rate sources can expose the cut; test at 100 % scale.
Risk Controls & Best Practices
• Always nest before aggressive speed changes to protect upstream edits and effect stacks.
• Feather & expand masks modestly (5–15 px) to hide tracking inaccuracies; animate path each frame when foreground edges move erratically.
• Use Lumetri scopes to match exposure and color temperature before transitions—sudden brightness jumps jar the viewer.
Practical Mini Case Study: 30-Second Weekend Travel Reel
Scenario: You shot a spontaneous weekend trip on an iPhone and an older mirrorless body. You want a fast 30-second vertical reel for Reels/Shorts, stitched with high-energy transitions to keep thumb-scrolling viewers locked in. Mobile consumption dominance plus social algorithm bias toward high completion rates makes tight cuts and clever transitions ROI-positive.
Storyboard Plan
• Hook: 3-sec establishing shot; whip down to trail POV.
• Speed Ramp: Accelerate final steps into drone takeoff clip.
• Masking: Hiker passes tree trunk; reveal campsite wide.
• Match Cut: Raise coffee mug at camp → similar mug shot in town café.
• Color Flash: Neon sign transition into night street time-lapse.
Single-Sequence Workflow
• Assemble selects in a 9:16 sequence; normalize exposure with basic Lumetri.
• Mark transitionable objects (tree, mug, sign) with sequence markers (M).
• Build ramps & masks at low-res proxies; relink full-res for export.
Quick Reference Table: Choosing the Right Transition
| Transition | Capture Requirement | Edit Actions | Best Use | Difficulty* |
|---|---|---|---|---|
| Speed Ramp | Some motion; high fps helps | Time Remap, Bezier ramp | Action beats, sports | Medium |
| Masking Pillar | Foreground object crossing frame | Animated mask, invert, feather | Reveal new location | High |
| Frame Blocking | Shared line/shape | Overlap, opacity fade | Architecture, interiors | Low |
| Whip | Planned fast pan both clips | Cut on blur, optional blur add | Energetic jump | Low-Medium |
| Speed & Direction | Objects move same way | Cut on action, align velocity | Street, travel, sports | Low |
| Match Cut | Similar pose/subject | Opacity align, trim | Narrative continuity | Medium |
| Color & Shape | Light flash or full-frame color | Cut on peak, grade hue | Music, promo, reels | Low |
*Difficulty assumes familiarity with Premiere Pro basics; adjust for experience.
Common Mistakes & Expert Tips
• Cutting Too Early in a Whip: Wait until motion blur fully wipes detail; otherwise the seam is obvious. Scrub audio too—whooshes help hide edits.
• Forgetting to Animate Mask Offscreen: Leaving first keyframe visible creates a hard black band (seen in many beginner edits). Always move mask out one frame past start.
• Harsh Speed Jumps: Without ramp handles, viewers feel a jolt. Separate Time Remap keyframes and bend Bezier for smoother acceleration.
• Color Mismatch Across Transition: Even great masking fails if exposure shifts. Use Lumetri scopes and, when needed, apply or tweak LUTs consistently across clips.
• Ignoring Platform Aspect Ratios: If delivering vertical, scale first before aligning masks so motion paths stay consistent across exports. Premiere Pro’s basic workflow supports multiple sequences for social delivery.
• Unoptimized Playback During Heavy Ramps: Render In/Out or use proxies; extreme Optical Flow can stutter in realtime.
FAQs
Action-Oriented Conclusion
Transitions aren’t decoration—they’re structural tools that guide the viewer’s eye, compress time, and bridge story beats across formats. With seven techniques under your belt—speed ramps, masks, frame blocks, whips, directional cuts, match cuts, and color flashes—you can turn raw travel clips, product b-roll, or branded social footage into tight, high-retention edits without buying plug-ins or switching apps. Your homework: pull two minutes of existing footage, mark natural motion events, and practice building each transition once. Save presets, label nests, and you’ve created a reusable transition toolkit that scales across campaigns and clients.
Level Up Your Edits with Adobe Premiere Pro →