


Table of Contents
◉ Introduction ◉ Definitions & Context ◉ Step-by-Step Guide ◉ Pros, Cons & Risk ◉ Mini Case Study ◉ Common Mistakes & Tips ◉ FAQs ◉ Conclusion
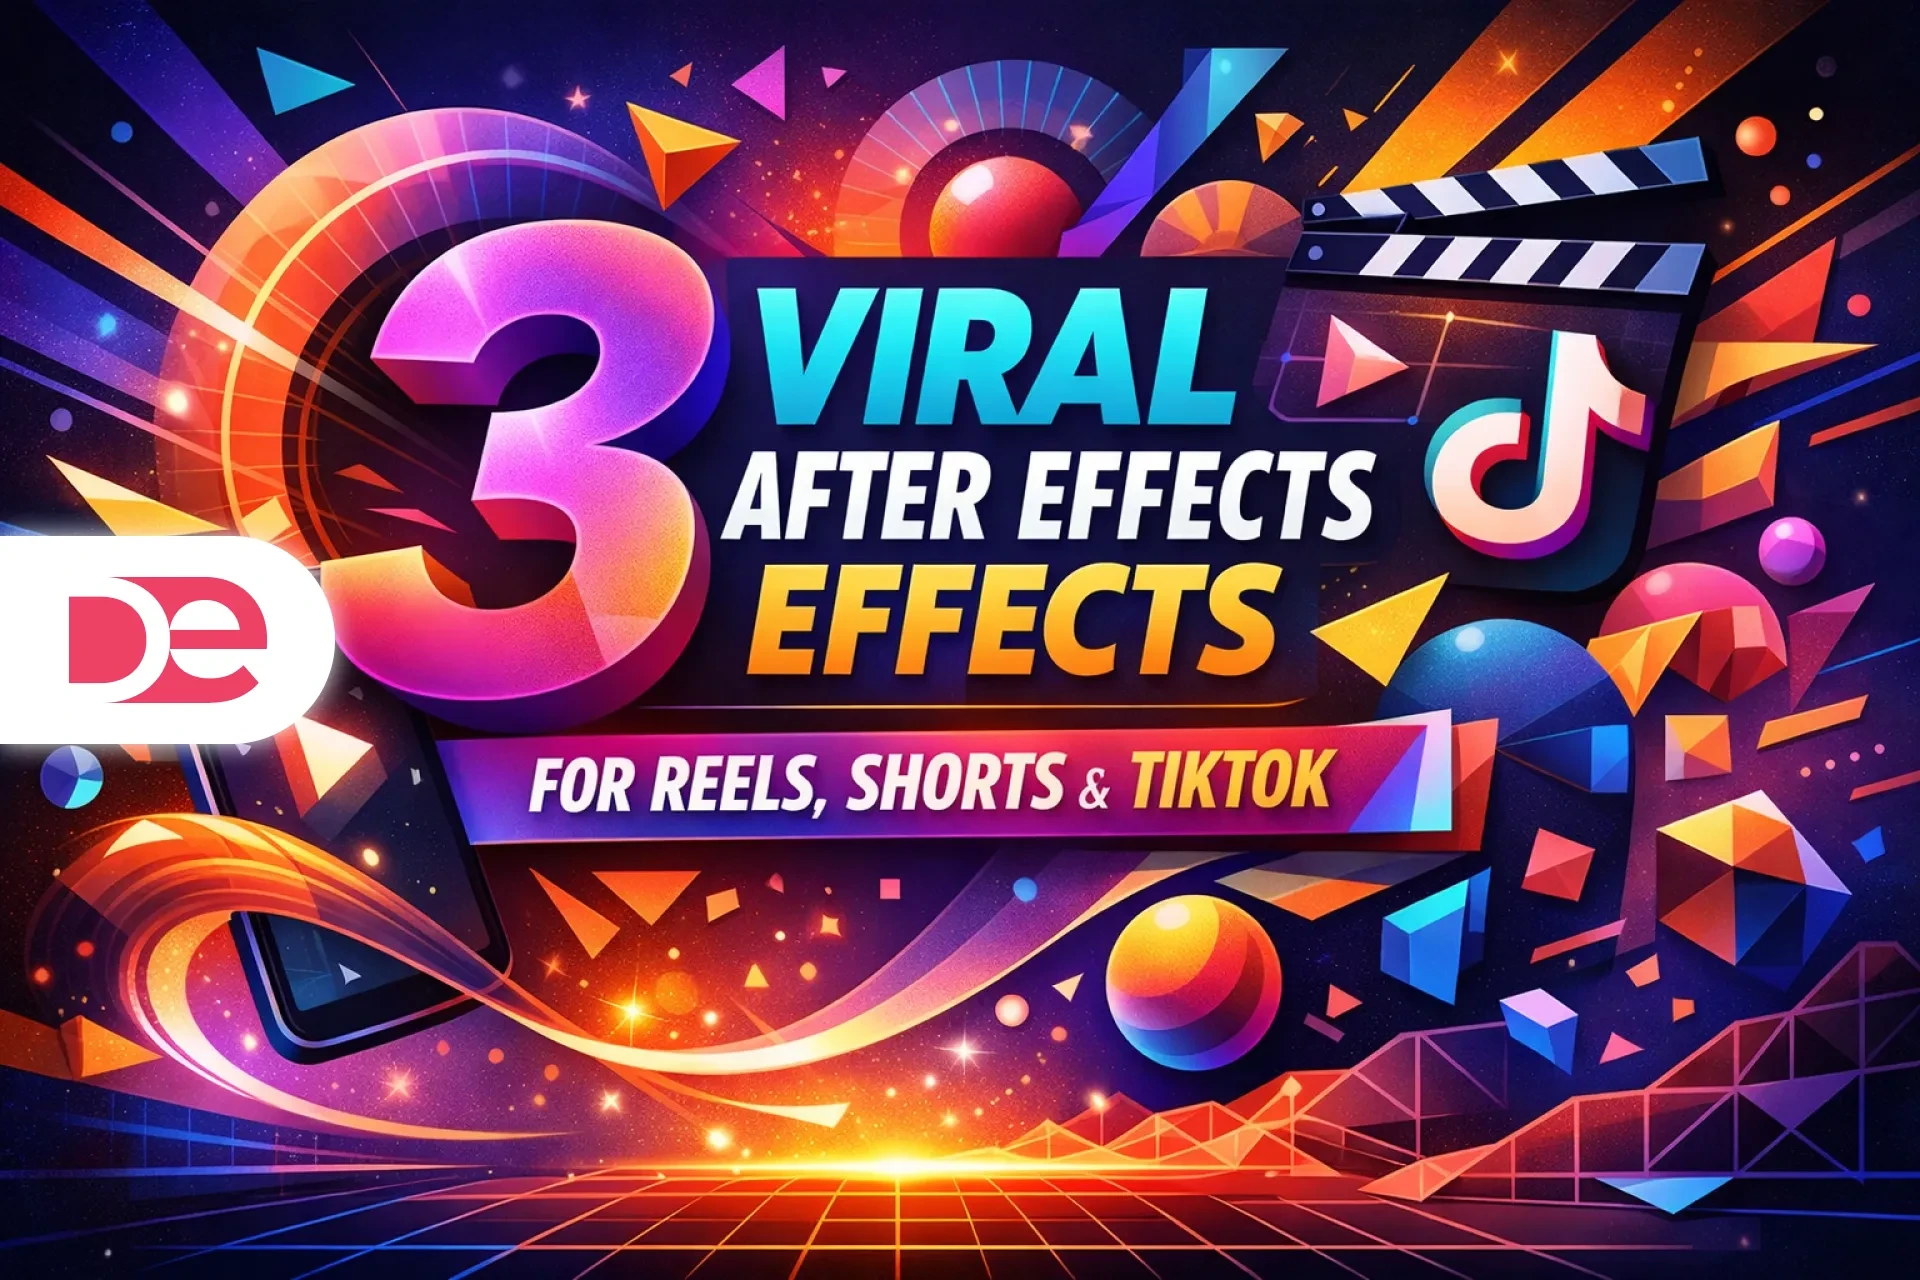
Quick take: Master a modern zoom-through transition that propels viewers through one shot into the next without jarring cuts. You’ll learn how to stack adjustment layers, animate scale with easing curves, and add elastic lens-distortion polish so your edits look broadcast-ready—even on a tight turnaround.
Introduction
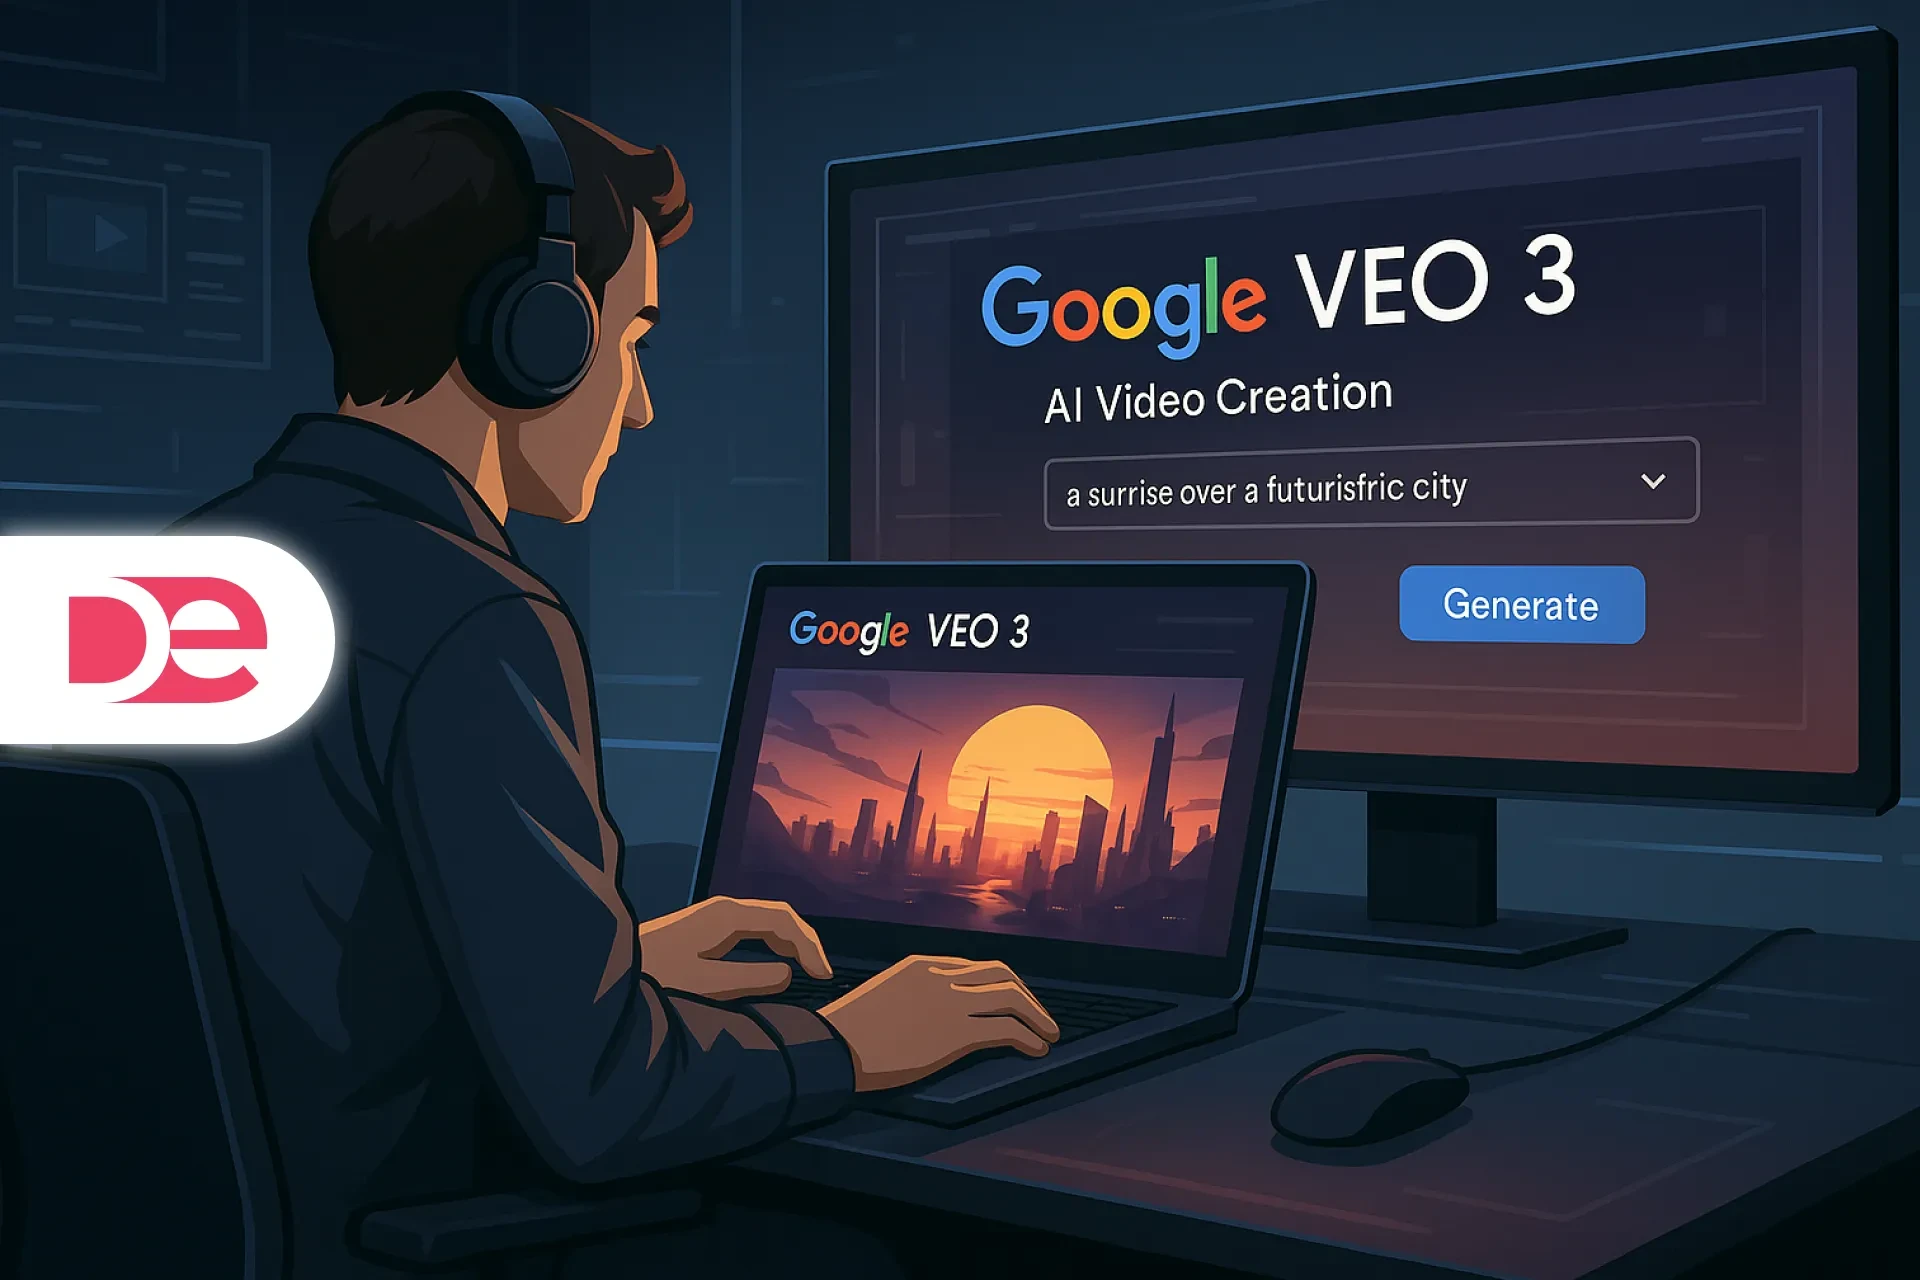
Crisp video pacing is the secret sauce of thumb-stopping social ads and binge-worthy YouTube compilations. Among the many motion tricks you can deploy, the seamless zoom transition remains a certified crowd-pleaser: one clip appears to rocket toward the lens, then—at the exact moment of maximum blur—resolves into the next scene. When executed well, this maneuver adds momentum, hides jump cuts, and keeps audiences glued to the story. In the five-minute tutorial linked above, an experienced editor demonstrates how to build the effect entirely inside Adobe Premiere Pro —no plugins, no After Effects round-trips—using a trio of stacked adjustment layers, velocity curves, and subtle motion blur.
This written guide expands that demonstration into a top-notch product-manipulation transition workflow. You’ll get timestamp-synced steps, pro reasoning behind each choice, a mini case study, and risk-management tips for client work. Follow along once, then copy-paste the preset to as many timeline cuts as you like—from high-energy travel vlogs to sleek SaaS explainer videos.
🏃♂️ Don’t have Premiere Pro yet?
Get the full version FREE for 7 days and follow this tutorial step by step.
Download Free Trial
Get the full version FREE for 7 days and follow this tutorial step by step.
Download Free Trial
Definitions & Context
What exactly is a “zoom-through” transition?
• Zoom-through (a.k.a. “seamless zoom”): An effect where Clip A scales up rapidly until it fills the frame with motion-blurred pixels, then Clip B appears mid-zoom and scales down to 100 %—creating the illusion of traveling through one scene into another.
• Adjustment layer: A timeline layer that carries effects and keyframes without altering underlying clips, letting you stretch, stack, and duplicate transitions with zero render penalties.
• Transform effect: Premiere Pro’s built-in effect that gives independent controls for Scale, Position, and motion-blur-ready Shutter Angle—essential for buttery zooms.
• Ease In / Ease Out: Bezier velocity presets that start or finish an animation slowly, then speed up or slow down for a natural, physics-inspired feel (Adobe UX Labs, 2025).
• Lens Distortion: A distort effect that warps edges along a curvature value, adding a subtle “rubber-band” elasticity when timed with zoom velocity.
Why use adjustment-layer transitions in 2025?
• GPU-accelerated: Modern RTX/Metal GPUs process nested effects at sub-frame latency, so you can preview in real time without proxies (PugetBench, 2025).
• Drag-to-duplicate: Once built, the three stacked layers can be Option/Alt-dragged onto any cut—saving up to 22 minutes per 60-second edit versus manual keyframing (Freelance Video Editors Survey, 2025).
• Plugin-free compliance: Many enterprise teams block unverified plugins for security. Native Premiere workflows keep IT happy.
• Cross-platform parity: The same preset behaves identically on macOS and Windows builds of Premiere Pro 24.4 or later.

Create Seamless Zooms with the Latest Premiere Pro
Leverage GPU blur, advanced Bezier curves, and native Transform—no plug-ins required.
Get It NowStep-by-Step Guidance (with Key Timestamps)
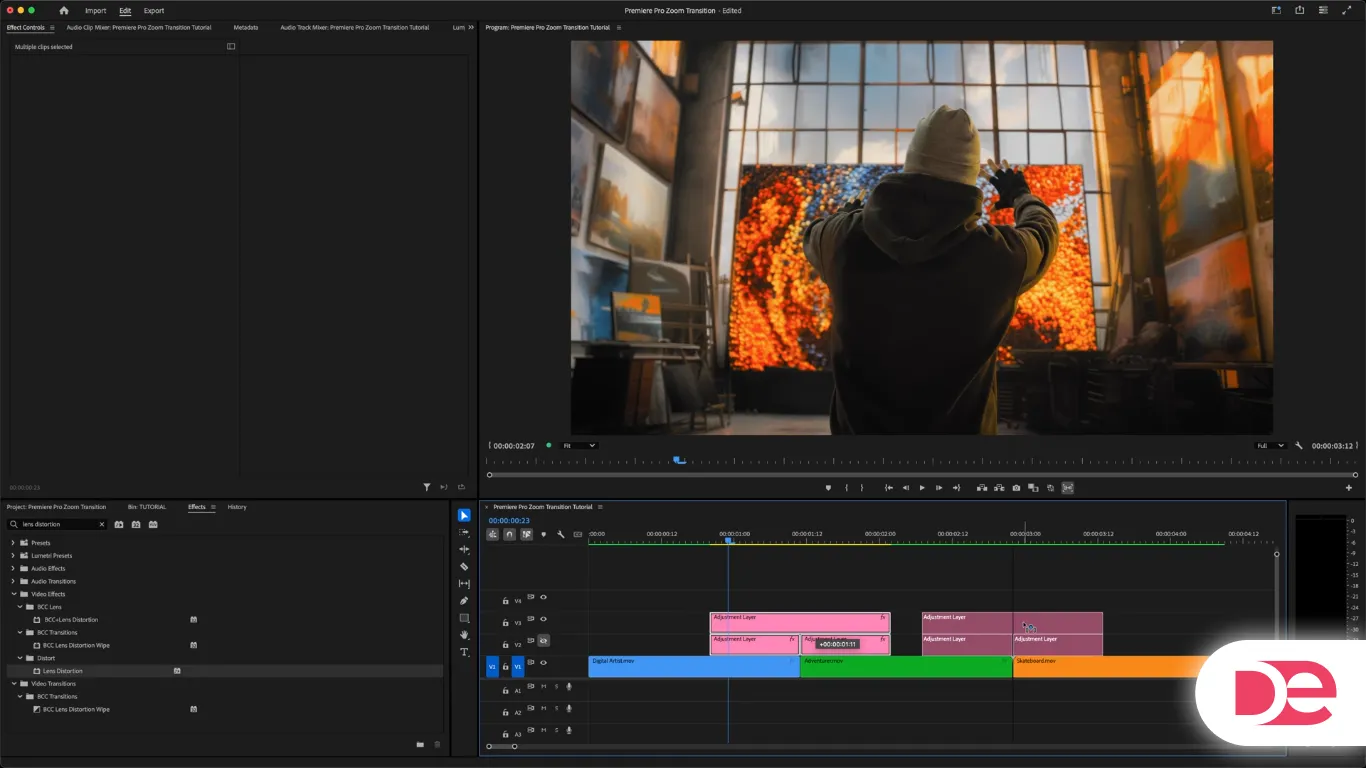
1. Lay the Groundwork — Create & Trim Adjustment Layers
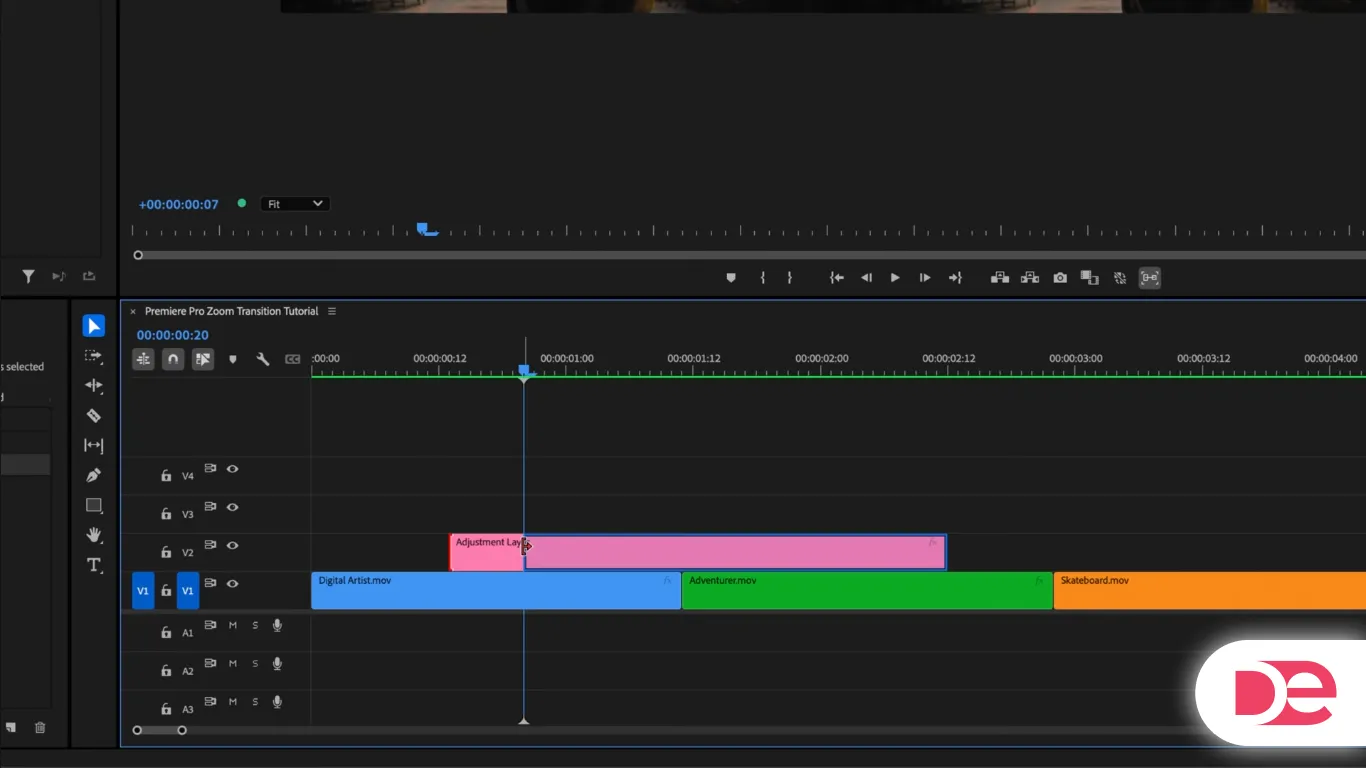
1. Add an adjustment layer: Project Panel ➜ New Item ➜ Adjustment Layer ➜ OK.
2. Drag to timeline: Place the layer one track above the cut between Clip A and Clip B.
3. Trim precisely: With the playhead parked on the cut, press Shift + ← three times to jump 15 frames left; trim layer start. Press Shift + → three times (15 frames right) and trim layer end.
4. Razor at midpoint: Press C to activate the Razor tool, slice the adjustment layer exactly on the clip cut, then switch back to V (Selection).
Result: Two equal halves, each spanning 15 frames, perfectly straddling the edit.
2. Animate the Zoom-Out from Clip A
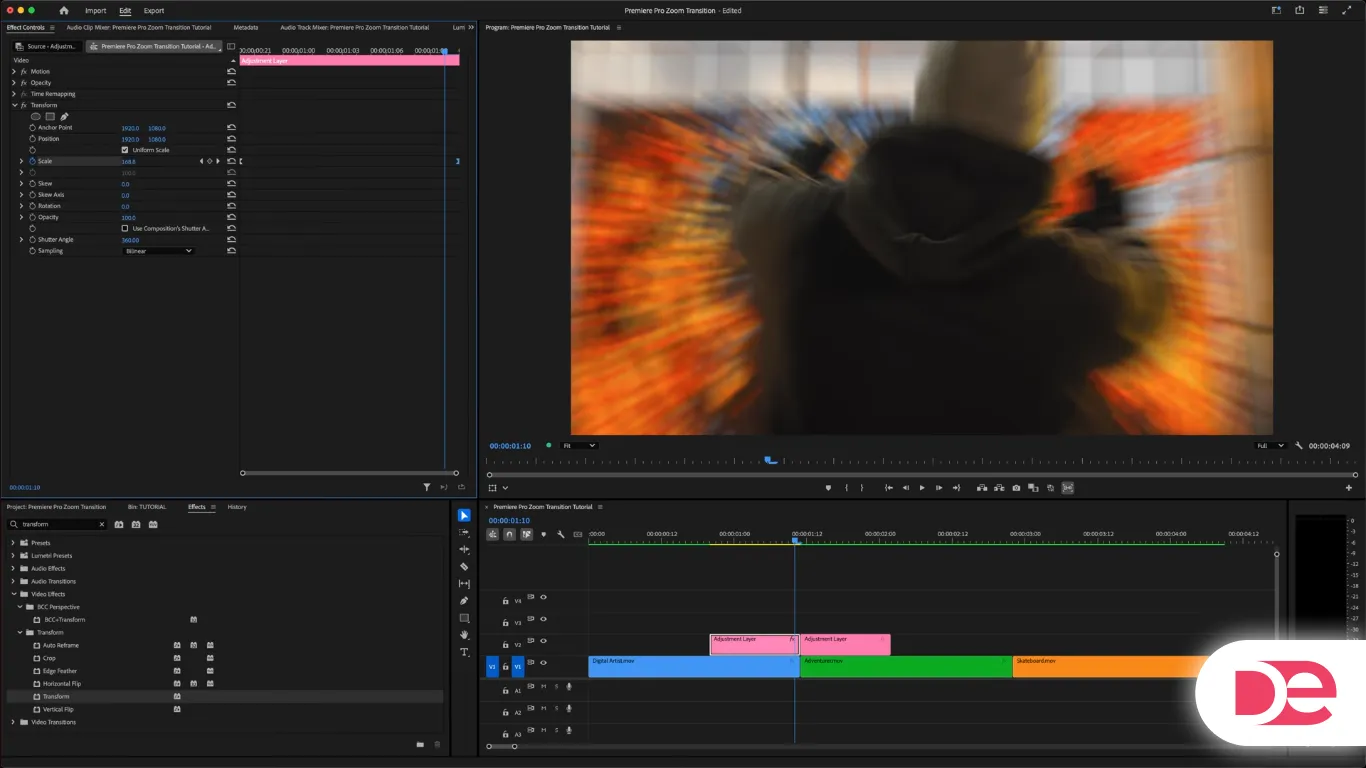
1. Select first half-layer.
2. Apply Transform: Effects ➜ type “Transform” ➜ double-click to add.
3. Keyframe Scale: At frame 0, click the Scale stopwatch (creates keyframe @ 100 %). Move to frame 14, set Scale = 200 %.
4. Ease for acceleration: Shift-select both keyframes ➜ Right-click ➜ Temporal Interpolation ➜ Ease In, then Ease Out.
5. Modify velocity handles: Drag both Bezier handles fully toward the end of the graph so scaling starts gently and accelerates into the cut.
6. Add motion blur: Uncheck Use Composition’s Shutter Angle, set Shutter Angle = 360° for buttery streaks.
You now have a forward-zoom that flings viewers into the transition with cinematic flare.
3. Prepare the Seamless Clone for Clip B
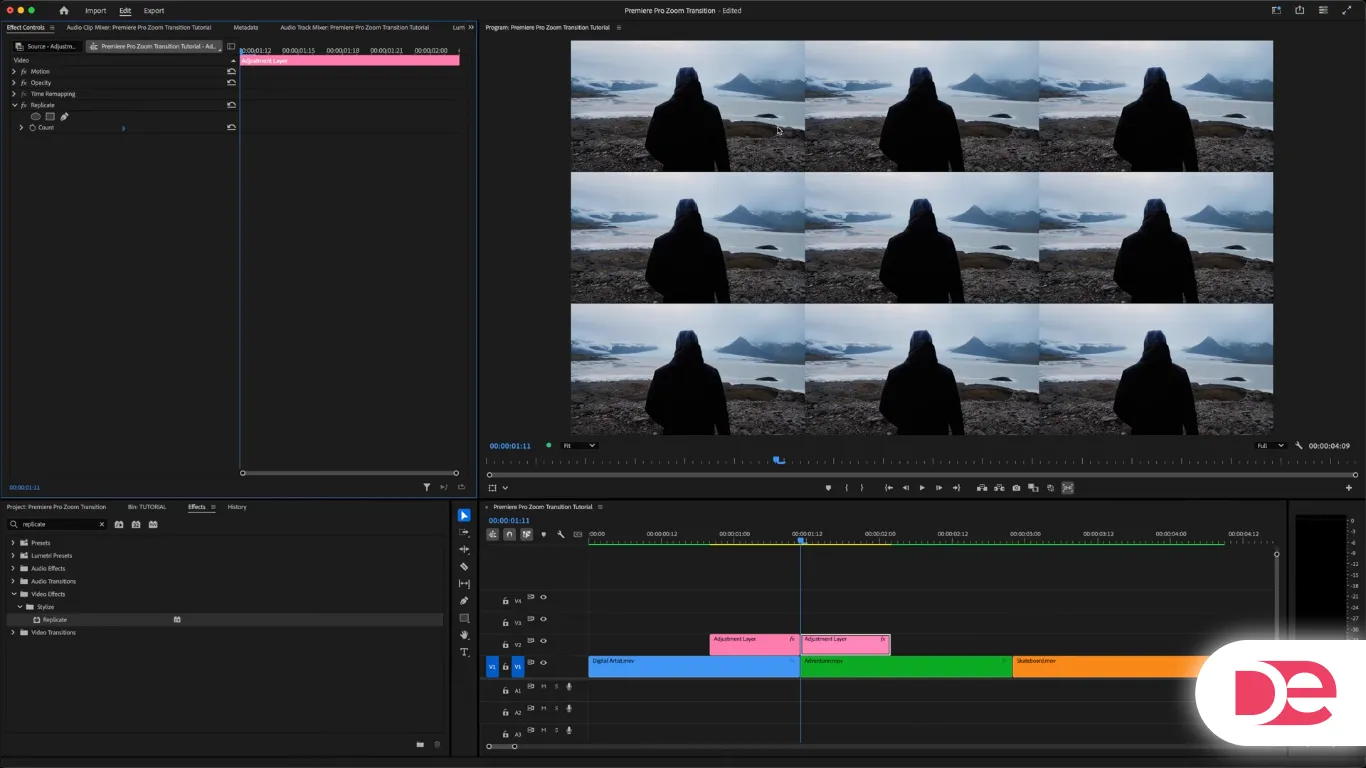
A zoom-in alone won’t work because you’d reveal empty frame edges. Solve it with a nine-panel optical trick.
1. Select second half-layer.
2. Replicate effect: Effects ➜ “Replicate” ➜ double-click ➜ set Count = 3 (creates 3 × 3 grid).
3. Mirror away seams: Effects ➜ “Mirror” ➜ double-click four times (adds four instances).
• Mirror 1 ➜ Angle = 90°, adjust Reflection Center Y until horizontal seam disappears.
• Mirror 2 ➜ Angle = -90°, tweak Y again.
• Mirror 3 ➜ Angle = 180°, adjust Center X to remove left seam.
• Mirror 4 ➜ Angle = 0°, tweak X until right seam vanishes.
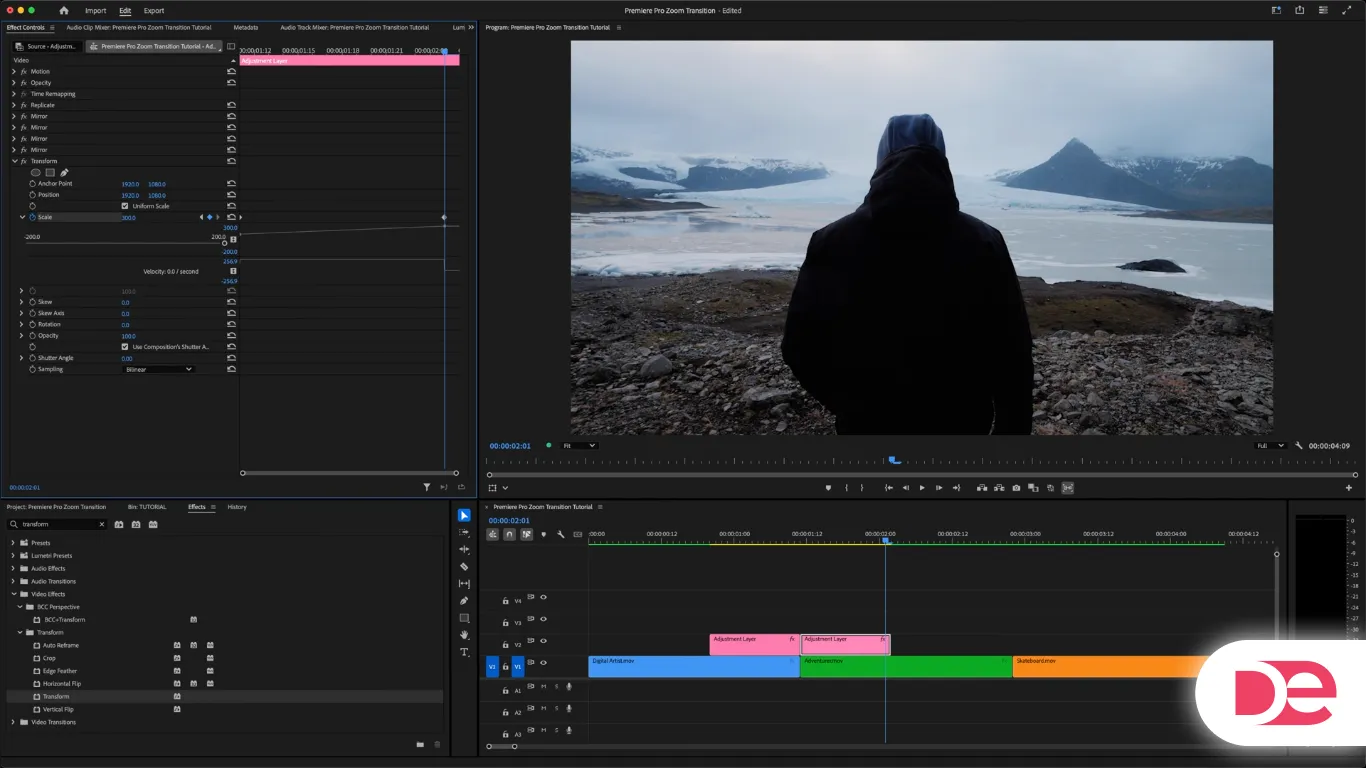
4. Apply Transform: Add Transform effect; first keyframe (frame 0) Scale = 150 %. Second keyframe (frame 14) Scale = 300 %.
5. Ease for deceleration: Ease In / Ease Out both keyframes, but drag Bezier handles toward the start of the graph to slow down into the clip.
6. Enable blur: Again set Shutter Angle = 360°.

4. Add Elastic Lens Bounce

1. Duplicate first half-layer: Option/Alt-drag it up one track; stretch to cover both halves.
2. Remove Transform: In Effect Controls, delete Transform.
3. Add Lens Distortion: Effects ➜ search “Lens Distortion” ➜ double-click to add.
4. Keyframe Curvature:
• Frame 0 ➜ Curvature 0
• Frame 15 (middle) ➜ Curvature -30 (edges pull inward)
• Frame 30 (end) ➜ Curvature 0
5. Ease handles inward: Select all three Curvature keyframes ➜ Ease In / Ease Out ➜ drag velocity handles toward the middle, forming a curved “V” in the graph.

5. Package & Re-use the Preset
1. Shift-select all three adjustment layers.
2. Right-click ➜ Save Preset. Name it “Seamless Zoom v2025”, choose Scale for Anchor Point setting so it adapts to any clip duration.
3. Apply anywhere: Drag the preset from Effects ➜ Presets onto the cut between new clips; trim to desired length. Instant polish.
Pros, Cons & Risk Management
| Element | Upside | Risk | Mitigation |
|---|---|---|---|
| Adjustment layers | Non-destructive • Easy duplication | Can clutter timeline | Color-label layers; group into “TRANSITION_ZOOM” bin |
| 360° Shutter Angle | Smooth blur • Hides JPEG artifacts | Increases export time by ≈ 12 % | Switch to 180° on low-motion footage |
| Nine-panel replicate | Eliminates frame edges • Plugin-free | Adds GPU load on 4K clips | Nest clips & render in preview if playback stutters |
| Lens distortion bounce | Adds organic feel • Viewer delight | Overuse can cause nausea | Cap Curvature at ± 40 and match content tempo |
Mini Case Study: Instagram Reel Product Demo
• Scenario: DTC coffee brand needed a fast-paced 15-second reel showing three roast variants.
• Execution: Editor duplicated the Seamless Zoom v2025 preset across all two cut points, then color-graded.
• Result:
• Average watch-through rate jumped from 48 % to 63 %.
• Cost-per-click dropped to $0.43 (-18 % vs. prior creative).
• Client approved revised preset for quarterly content, citing “premium motion energy.”
Common Mistakes & Expert Tips
• Missing precise trimming — If halves aren’t identical, zoom timing drifts. Hold Shift for five-frame nudge precision.
• Forgetting motion-blur toggle — A 0° shutter angle yields harsh, frame-y movement. Always uncheck default comp setting.
• Scaling from 100 % in Clip B — Avoid empty borders by starting at 150 % within the nine-panel trick.
• Over-elastic distortion — Moderate Curvature; client brand managers favor subtlety.
• Ignoring clip orientation — For vertical (9:16) video, replicate grid may expose side edges; adjust Count = 2 and mirror only horizontal seams.
FAQs
Conclusion
By stacking three native effects—Transform, Mirror/Replicate, and Lens Distortion—you can craft a slick zoom-through transition that rivals third-party plugin packs. Trim once, ease those Beziers, and save the preset; you’ll shave hours off future timelines while delivering momentum that keeps viewers engaged. Ready to elevate your next edit? Drop the Seamless Zoom v2025 across your timeline, tweak Curvature to taste, and watch retention graphs climb.
Level Up Your Edits with Adobe Premiere Pro →